Black bars in a Premiere Pro vertical export: check all three frames
Trace black bars through the source clip, sequence, and export before cropping away part of your picture.
A vertical file does not guarantee that its picture fills the frame. A wide sequence can be placed inside a tall export, or the source may already contain black pixels around the image.
In this guide
Premiere desktop, ordinary 9:16 delivery using square pixels. 1080 × 1920 is an example, not a requirement for every platform. Media Encoder settings are identified separately; beta and mobile workflows have not been checked.
Find the first frame that contains the bars
Look at the original source, the sequence preview, and the exported file in that order. Record the width and height at each stage. Do this before increasing Scale: zooming can remove the bars by cropping content you still need.
| Where the bars first appear | Likely area to inspect |
|---|---|
| In the original source image | Borders may already be part of the footage. |
| In the sequence, but not the source | Sequence shape, clip size, position, or an intentional matte |
| Only in the export | Output dimensions and source scaling |
| Only around a player window | The player’s display area rather than the encoded picture |
This is a diagnostic order, not a claim that each symptom has only one cause. Move through several frames; a title, transition, or nested clip can introduce a different border later.
Before changing dimensions, save a project copy or duplicate the sequence. If the export already measures 1080 × 1920 but contains a small landscape picture, exporting at 1080 × 1920 again will preserve that composition. Return to the sequence and decide how each shot should occupy the tall canvas.
Align the sequence with the intended output
For a 9:16 example, the sequence is 1080 pixels wide and 1920 pixels high, not the reverse. Square pixels have a pixel aspect ratio of 1.0. Frame aspect and pixel aspect are separate settings. Adobe’s aspect ratio reference
Adobe documents a new sequence through File > New > Sequence > Settings, where Frame Size accepts horizontal and vertical dimensions. For an existing edit, preserve the original sequence before changing its shape. Set sequence aspect ratio
Recheck the framing of every shot, title, and caption after changing dimensions. A shot that was composed for a wide frame may need a deliberate vertical composition. If the full wide image must stay visible, an empty area or a designed background can be the intended trade-off.
Distinguish fitting from filling
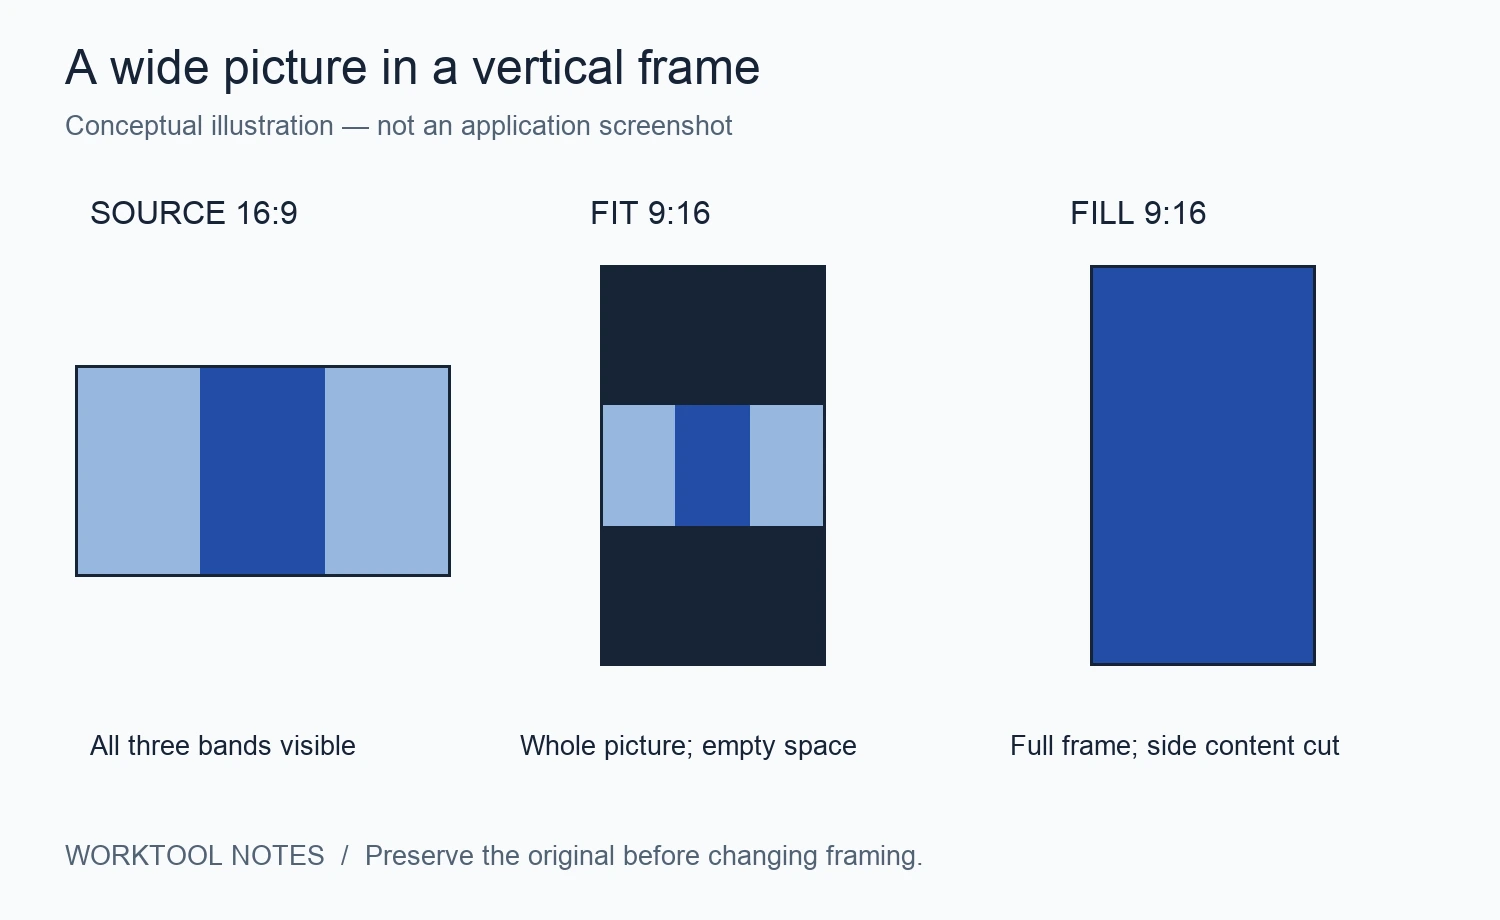
A wide image cannot fill a tall frame, keep its shape, and retain its entire picture at the same time. You must decide which requirement matters. Filling generally crops; fitting preserves the whole picture and can leave space.
For exports queued in Adobe Media Encoder, the Output tab’s Source Scaling options make this distinction explicit:
- Scale to Fit retains the full image and may add bars.
- Scale to Fill crops as necessary to cover the output frame.
- Stretch to Fill can distort the picture.
These labels refer to the Media Encoder interface, not an assumed menu in every Premiere release. Media Encoder export reference
Check the export independently
Check Frame Size in the export settings. A Match Source option follows the selected source settings; it does not automatically turn a landscape sequence into a vertical composition. Adobe notes that export options vary by format. Premiere export settings
Export a short section under a new filename. Inspect the actual file dimensions and play it without enlarging or cropping in the viewer. If black pixels were already encoded into the source, changing only the file dimensions will not identify and remove those borders for you. If one shot has bars and the next does not, inspect the affected clip or nested sequence rather than applying a global crop to the entire export. Check the beginning, middle, and end of moving shots so a static crop does not cut off the subject later.
If the bars remain, contact Adobe support with source, sequence, and export dimensions; pixel aspect ratios; the exact Premiere release; and whether Media Encoder was used. Include a non-confidential frame showing where the bars first appear.
Sources and review date
Official documentation consulted on 2026-09-20. Diagnostic suggestions are editorial guidance, not a promise of a particular result.
- Adobe — Aspect ratiosChecked 2026-09-20
- Adobe — Set the aspect ratio of a sequenceChecked 2026-09-20
- Adobe — Premiere export settingsChecked 2026-09-20
- Adobe — Media Encoder export settingsChecked 2026-09-20
- Adobe Help CenterChecked 2026-09-20