Premiere Pro freezes a shot during a Cross Dissolve
Find the missing source frames behind a frozen dissolve, then choose a shorter overlap or a careful trim without losing important action.
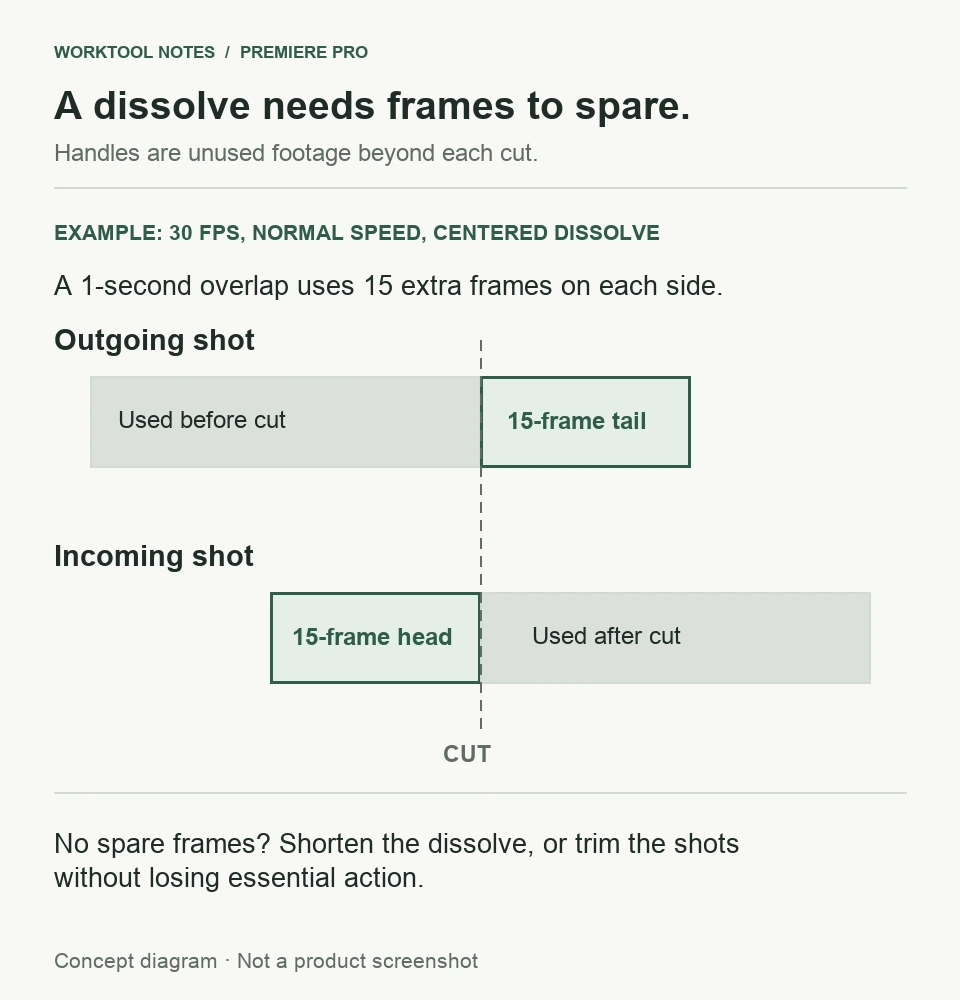
If a shot stops moving during a Cross Dissolve and Premiere warns about Insufficient Media, inspect the unused source frames at that cut. The dissolve needs footage beyond the outgoing clip's Out point and before the incoming clip's In point. A long clip can still have no spare frames at its edge.
In this guide
Adobe Premiere Pro on Windows and macOS, desktop releases with the documented Timeline and Effect Controls transition controls. Covers ordinary moving footage with Cross Dissolve and insufficient-media/repeated-frame symptoms. Does not diagnose playback performance, intentional Frame Hold, plug-in transitions, nested-sequence duration, or missing media.
Before you trim the clips
Save a project copy and duplicate the sequence before trimming. A ripple trim changes the edit's timing and can move later material; try a shorter transition first if the cut must stay fixed.
Confirm that the pause belongs to the dissolve
Zoom into the affected cut in the Timeline. Look for diagonal warning bars inside the transition, then scrub through it and compare movement just before and after it. Adobe's clip-handle guide explains that Premiere can fill an insufficient transition with repeated end frames.
| What you see | Next check |
|---|---|
| A pause inside a striped transition | Unused footage at the two clip edges |
| The shot remains still outside the transition | The source or an intentional Frame Hold |
| Only normal playback stutters; scrubbing shows changing images | Playback performance, rather than missing transition footage |
For a still that continues through the clip, use the separate Frame Hold checks. Do not remove an intentional hold to repair a dissolve.
Shorten the existing transition without changing the cut
Select the transition, then open Window > Effect Controls. Note its Duration and Alignment so you can restore them. Reduce Duration while keeping Alignment unchanged, then scrub through the same moving detail again. Adobe documents this duration control; double-clicking the transition in the Timeline also opens Set Transition Duration.
If the warning bars and pause disappear at a shorter duration, that cut had enough footage for the smaller overlap. Compare the pacing before keeping it. If either edge has no unused footage at all, shortening alone cannot create it.
Alignment determines where the transition sits around the cut. Center at Cut, Start at Cut, and End at Cut are different timings, not quality settings. Do not change alignment repeatedly and assume that the same two-shot blend has been preserved.
Leave source footage outside the edit
Compare the used section with each original clip in the Source Monitor. At the outgoing edge, look for recorded frames after the used Out point; at the incoming edge, look for recorded frames before the used In point. Inspect those frames too: a lens cap or a camera bump is technically available footage but may be unsuitable for the dissolve.
For example, using the final image of a ten-second recording as the outgoing edge leaves no recorded motion after it. Ending that shot earlier reserves a tail. Using the incoming recording from its first image leaves no head; starting later reserves one. Making the transition bar longer does neither.
In the duplicate sequence, use the Ripple Edit tool (B) to trim the outgoing end inward, or the incoming beginning inward, where a handle is missing. Keep the clips adjacent, then inspect the dissolve again. Adobe's ripple-edit instructions explain that downstream clips shift and the sequence duration changes. Review speech, music cues, titles, and the final running time before accepting this new edit.
Keep the cut when losing content is unacceptable
If the edge contains a word or action you must keep and no usable spare footage exists, keep a straight cut or choose a different transition design. A single-sided transition can affect only one clip, but it is a different visual result from blending both moving shots. Preview the surrounding composition before using it.
Export a short sample under a new filename and inspect the motion through the cut. If repetition remains with suitable handles and a short dissolve, use the Community link in Adobe's clip-handle guide. Include the Premiere version, transition duration and alignment, and a cropped Timeline view without private filenames.
Sources
Based on official documentation; not independently tested. Sources checked Oct 5, 2026. How we review guides
Something out of date? Let us know.